Setting up your AWS Account
Setting up Athena requires creating an IAM user that will have permission to run queries with Amazon Athena and access the S3 buckets that contain your data.
To set up your Amazon Athena and gain the necessary permissions, follow these steps:
- If you’ve already signed up for Amazon Web Services (AWS), you can start using Amazon Athena right away. Otherwise, you’ll need to create an AWS account.
- To create an AWS account, go to https://portal.aws.amazon.com/billing/signup and follow the instructions. You’ll need to receive a phone call and enter a verification code during the sign-up process.
- Once you’ve signed up, create an administrative user to handle your day-to-day tasks instead of using the root user.
- To ensure your AWS account is secure, sign in to the AWS Management Console as the account owner using the root user, then turn on multi-factor authentication (MFA) for the root user.
- Attach the appropriate managed policies for Athena to the IAM roles that users can assume in order to use Athena. These managed policies are AmazonAthenaFullAccess and AWSQuicksightAthenaAccess, and they grant permissions to query Amazon S3 and write query results to a separate bucket on your behalf.
- To create a role that grants access to Athena, attach the Athena-managed policies to the role. Follow the steps in the IAM User Guide to add the policies to the role that you created.
Adding Amazon Athena to Apica
Once you’ve set up Athena, the next step is to create and add the Amazon Athena data source to your Apica account.
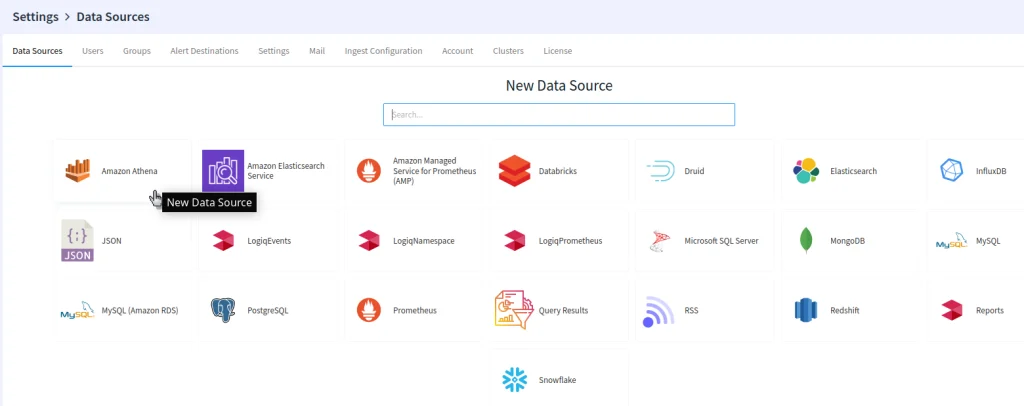
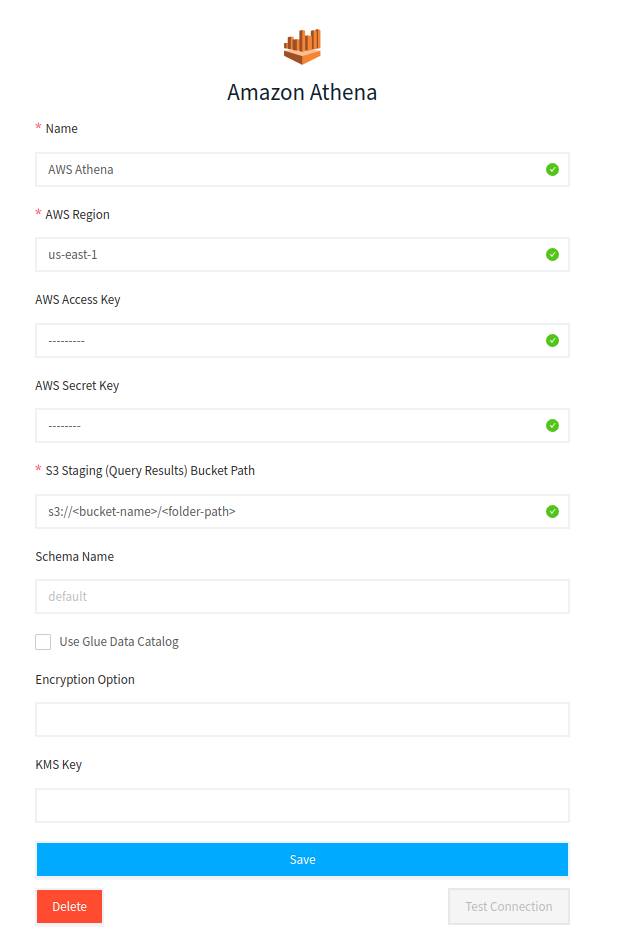
To add Athena data source to apica.io, you will need to provide the following information:
1. AWS Access Key and AWS Secret Key: These keys are used to authenticate your connection to Athena. You can find these keys in the AWS Management Console under “Security Credentials.”
2. AWS Region: This is the region where you use Amazon Athena. You can select the region from a drop-down menu in the apica.io user interface.
3. S3 Staging Path: This is the bucket Amazon Athena uses for staging/query results. You might have created it already if you used Amazon Athena from the AWS console – simply copy the same path.
Once you’ve provided this information, you can add the Athena data source to your apica.io account. You can then use the Apica query editor to analyze your data using standard SQL queries.
In summary, apica.io supports Athena services for AWS directly as data sources, making it easy to analyze data stored in Amazon S3 using standard SQL queries. To get started, you’ll need to set up Athena and create an IAM user with the necessary permissions.
Once you’ve done that, you can create an Athena data source in apica.io and start analyzing your data using the query editor.